Monday, December 16, 2013

Holiday project - no card!

Challenge #191 Anything but a card, Holiday ed.
Show us your holiday (non-card) projects. This could be holiday decor, tags, packaging and gift ideas...

~This Weeks Sponsor~

Winner will receive the Trim the Tree Cricut Cartridge!
Be sure to visit the blog and join in the challenge. You just need to use 1 Cricut cut to qualify for this week's prize.

For my project this week I used some of the vinyl I had left over from Vinyl University to create this for a friend. She is having a big birthday this year and I have been giving her something (present, email, etc) to celebrate the last _9 days before the big day. Her birthday is the day after Christmas so some of the items are Christmas themed.


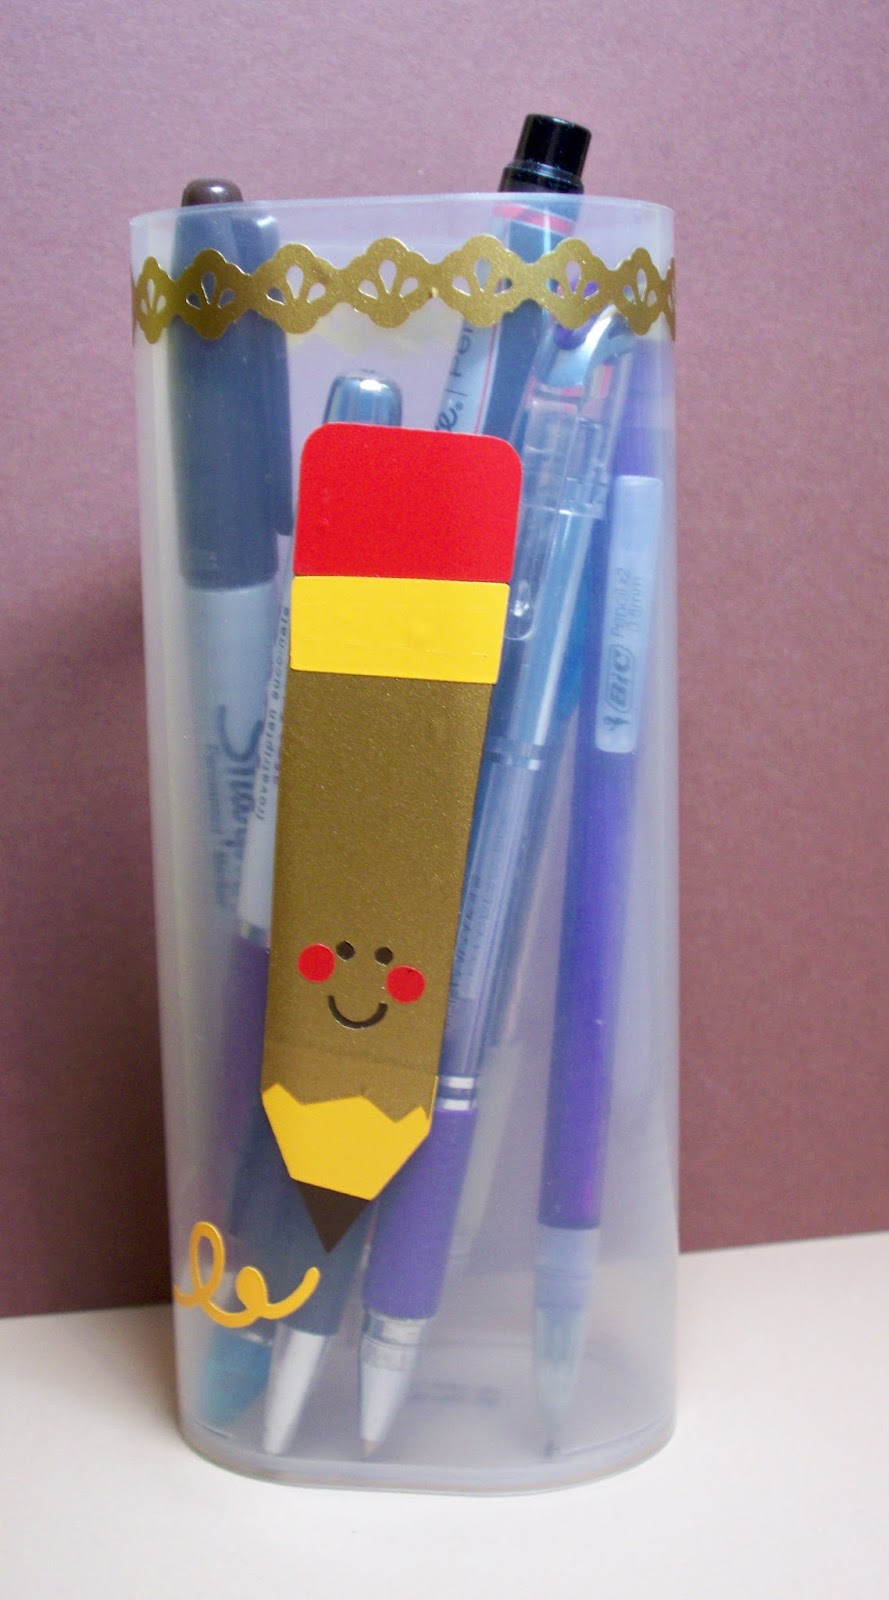
I picked up the cup at the dollar store. It will have to be hand washed, but that's ok. I cut the ornament above at 3 1/2 inches. The only downside was that the red layer didn't cut to exactly match the bottom so I had to put each stripe on individually. It may cut that way all the time, or it may be because I have the "paper saver" feature on on my Cricut. Either way it was a bit of a pain but it turned out pretty well. (The red shows up better in person than it does in the picture.)


This ornament was cut at 2 3/4" from the same cartridge.


There are 3 snowflakes on the cup that were cut at 1 1/2". All of the vinyl came from Cricket Vinyl Supplies. Go check them out if you are interested in working with vinyl.

I know it's a crazy time of year but please join us this week. It is a great opportunity to create a new decoration or gift for someone!


Monday, December 2, 2013

Christmas - beyond red and green


Good morning! I hope everyone in the US had a wonderful Thanksgiving weekend. 

The challenge this week at FCCB was to make a Christmas item/card with no red or green. I saw a picture in a magazine of a tree with silver, pink and white decorations and I used that for inspiration for my card. I used one traditional Christmas cartridge, and one you might not think of using for Christmas for my card.


The ornaments were cut at 2 1/2", 1 1/2" and 1 1/4" from the Joys of the Season cartridge. The background pink shapes at the top were cut at 3" and 2 1/2" from the Suburbia cartridge. The pink paper is from one of the DCWV Halloween stacks. The background is actually a silver pearlized paper from my stash. The snowflakes were cut with a Martha Stewart punch using the same pink paper and some silver I got a couple of years ago at Tuesday Morning. The ribbon is from Offray.  

It was fun to take Christmas to a place past red and green. I hope everyone has a great week.

Monday, November 18, 2013

Santa Pooh

The challenge this week at Fantabulous Cricut is to make a project with an animal. Well, Pooh is my favorite animal so I chose him!


I cut him at 3 1/2" from the Pooh and Friends cartridge. I found a Santa hat on the Paper Doll Dress Up cartridge and cut that at the same size. Well, that didn't work too well, it was WAY too big!! I cut the one that's on him at 2 1/2" and it fit pretty well. I used some flocking to make the rim on the hat. You can't really tell there is supposed to be a ball on the end. I looked for one but couldn't find one in my stash. 

I put some seam binding on the front and stuck a strip of bling across it to a a little sparkle. I will add the appropriate sentiment on the inside.

I hope everyone enjoys all of the animal creations. Have a great week!

Monday, November 4, 2013

Blog Crawl


Welcome to a Fantabulous Cricut Blog Crawl
A blog crawl is our version of a Blog hop. We are opening up a DT call, please see the FCCB blog for more information. We also have a wonderful new sponsor this week:
They are giving away a bag of crafty goodness to one lucky challenge participant.
Be sure to visit each of the Design Team members' blogs to see their projects.
If you get lost along the way, you can go back  to the FCCB blog or see the list below of all of the participating blogs.
When you are done with the crawl, go back to the FCCB blog and link up your project.
 The challenge is Anything Goes! We want to see your Cricut projects. To qualify for the weekly prize for a fabulous sponsors, you need to make sure to have at least 1 Cricut cut.


For my project this week I created a card from the Art Deco cartridge. I love that thing! I have a couple of male friends with birthdays coming up and it's really nice for guy cards.


All of the cuts were made using solid color Recollections card stock. There were 4 layers plus the card itself. Being able to cut the card base and the whole top to fit is a great feature of this cartridge. I cut it at 5 1/2" and it ended up being 3 3/4" wide. It was a little dull when I was finished so I sprayed it with some glimmer spray to give it a little more pizzazz. I also added 3 little red gems. It broke up the big beige spot a little. 

I did have one issue with the cutting. I based it on the colors in the handbook and it turned out opposite of what it looked like it should have. That was a little problematic, but it turned out ok. I think the recipient will still appreciate (after all, he won't know it wasn't supposed to be that way). 

I hope everyone is enjoying the Crawl. Your next stop is Missy at Quick Chick Designs. If you get lost the full crawl list is below. Have a great week and be sure to join us for the Anything Goes challenge! (Remember to list the Cricut cut you used!)


Blog Crawl List:

Cindy - Creating with the Heart
Jackie- Luv 2 Scrap
Kim - Kim's Kreations
Amy HS - The Stamping Tree
Emily - Mollie's Motif
Heather - Scrapping Runner Creations</ a>
Lynn -
My Cards n Stuff
Missy - Quick Chick Designs
Nikki - Crafty Calamities
Rebecca- Crafting Misfit
Michelle- Just a Nutter Paper Crafter
Caterina- Docerla Creations
Joneita- Create with Joneita
LB - Cool Beans by LB
Amy T - Crafting with Amy

Sunday, November 3, 2013

New Winner!!

Since I never heard from the winner of the blog candy from Vinyl University I picked a new winner. Congratulations Roberta from Queen Bee Paper Crafts!! Please put your email address in the comment so I can send out your prize:-)

The beginning of Christmas shopping..


This is not a crafty post, just a quick share. Guess that make it part of the 'N Stuff.

My daughter and I went shopping last weekend and I picked up a few Christmas things. As I was waiting in the car for her to pick up a last minute piece of her Halloween costume I noticed how blue the sky was, and how nice the palm trees looked against it, so I snapped a quick picture. I grew up in Wyoming and this is NOT what Christmas shopping looked like there. I am ready for a little cool weather!!


Monday, October 21, 2013

Home Decor - Halloween

This week's challenge at Fantabulous Cricut is to make a home decor project with a fall or Halloween theme. These types of projects are challenging for me because I spend most of my crafting time making cards. It was good to step out of my box, though I'm not sure I'm 100% happy with the outcome.


I painted a 6x6 canvas with some purple paint. There is a black mat behind the patterned DCWV paper. The bird was cut from the same black solid paper. The patterned paper is raised away from the black paper with foam tape. The bird is also on foam tape. The bird is from the October 31st cartridge and was cut at 3 1/2". I did put a scrap of yellow behind the eye to make it stand out (plus it upped the creepy factor quite a bit!). 

One of the things I like about these particular canvases is that they are quite deep so I can hang this if I want to, or I can set it on a shelf/table. It makes for a more versatile piece.

I hope you are inspired by someone's project this week and decide to join us for this challenge. 

Saturday, October 19, 2013

Monkeying around....

I made this cute little guy for a baby shower gift. It's a 6x6 canvas so it can be hung or placed on a shelf. 


It was kind of fun to delve into a little of the world of working on canvas. I was my first attempt at some of this. I painted the background and then used mod podge to glue down the paper. The stars were made using modeling paste. After they dried I used gold Rub 'n Buff to make them shine a bit. You can still see some of the white but it didn't seem to mess things up too much.  I put one coat of MP over all of that for durability. The monkey and moon were cut from the Create a Critter cartridge. I don't know why I felt like the moon needed a little bling, but I did. The parents can put the babies name down in the corner if they want.  

I am looking forward to doing more of these, it was fun!

Sunday, October 13, 2013

Winner ;-)

I posted the winner of the blog candy from the Fantabulous Cricut Vinyl University almost a month ago on this post http://mycardsnstuff.blogspot.com/2013/09/abcs-123s-at-fantabulous-cricut.html.

I haven't heard from the winner yet. If I don't by the end of this week (Friday), I will draw a new winner.

Monday, October 7, 2013

Have your cake...

is the theme this week at Fantabulous Cricut! Even if you don't have a specific event you need a card for, it's always good to have a couple of cake cards in your stash. They can be used for birthdays, anniversaries, weddings or even congratulations. Here's my creation for the week.

I used the cake from the "Best of 2010" Cricut cartridge. There is a combination of old and new to me papers. The solids are Recollections and the prints are from Crate Paper and one other I can't remember. The background piece with the arrows and the frosting for the cake are the front and back of the same piece. The color scheme is not my norm, but I thought I'd try to break out of my box a bit and try something a little different.


I used Dimensional Magic on the frosting to make it look a little shiny. The cut sprinkles were placed onto the wet "magic" and left to dry. They stayed on top so there is a bit of a difference in the look that you can see better on the actual card. The bling in the corners is from WalMart.

I really need to get some Halloween stuff going. That will probably be my next post! Have a good week everyone.

Monday, September 23, 2013

Going Places at Fantabulous Cricut

Welcome!!
Today at Fantabulous Cricut we are all going places and making projects showcasing ways to get there.

I made a card (surprise, huh!!) that was inspired by a 6x6 Prima paper stack called Spaceboy. This card is a little different for me as it opens at the top. I have a mini clothespin holding it in the picture but I think I might trade it out for a mini silver binder clip. 

I don't know what happened with this picture, the background color is so pink! The real color is the other pictures:/

The card is a typical A2 size and the base the white layer. The front of the card is just the paper with a little added bling and a sentiment from the Just Because Cards cartridge. I used my Cri-Kits glitter pens to trace the stencil image and then cut around it.


When you open the card the sides go down and the rocket is blasting off. The rocket is cut from the Everyday Paper Dolls cartridge at 4". The paper that is covering the front and back of the card is from the same Prima stack. The blue that the rocket is on is Recollections. 

I folded a piece of paper that was the same size as the base and folded each side in half (looks like a "W") and glued it in the center of the base. I debated trying to make it pop up or just do it this way. The pocket that was created could be used to tuck a gift card or some cash into.

I hope everyone enjoys all the projects this week, have a good one!

Monday, September 16, 2013

ABC's - 123's at Fantabulous Cricut

Good grief! I totally forgot that I said I would do a project this week with my Cri-kits pens for Fantabulous Cricut. This card was literally done in 15 minutes, so be patient with it.

I used my Sizzix Flip it card die for the base and a Spellbinders scalloped circle for the insets. Where did I use the Cricut you ask?? Well, I used my Cri-kits glitter gel pens to draw the "boo" and the ghost with the Simply Charmed Cricut cartridge. They worked really well and made quick work for the card.

Peachy Keen Stamp face (don't judge the stamping - it was super quick)

I added a little orange seam binding and a few buttons and voila, a super quick Halloween card. I will definitely be using those pens more in the future, they were great!!

Ok, now for the winner of my blog candy. Lisa C. of my Little Bits!! Contact me with your addy and I'll get that package out this week:-)

Have a great week.


Tuesday, September 10, 2013

Vinyl Project #3

As promised here is the little tutorial and my third vinyl project for the week of Vinyl EDU at Fantabulous Cricut. If I can think of any more things to do with it (and have time) there could be more...

I started with this empty container, added some vinyl, and ended up with this cute pencil holder.

I used the Simply Charmed cartridge for the cute pencil. I tried this project once before with a different cartridge and it cut differently than I expected it to which caused some wasted vinyl. Hopefully my mistake will keep someone else from doing it.

I decided to do a test run with paper this time. I set my Cricut as shown below to cut the vinyl. I had the blade depth at 3 for the first try, but raised it to 4 on the red vinyl as it seemed a bit thicker. I also turned on the multi-cut feature to get a clean cut for weeding purposes.

excuse the dust!
 I cut it out in white card stock before I tried it on the vinyl. 

I didn't change the settings, but I could see which way it was going to cut and how long a piece of vinyl I would need.


I didn't change the settings so I outlined it so you could see.

I cut the trial piece 4" and made my final piece 4 1/2" since I had a little more room than I originally thought.


Here is the base piece cut out with the transfer tape on top. I am very stingy with my supplies of this and only use what I need. I burnished the image onto the transfer tape to avoid wrinkles, etc.


After the pencil had adhered to the transfer tape I removed the backing and added it to the container. I added the rest of the layers and ended up with this cute little guy! 


I will admit I had a hard time getting the layers to line up but it was worth it in the end. I ended up cutting the transfer tape right next to the straight edges on the larger pieces in order to get them sort of lined up. 

I made one discovery that I was pleased with. I found out that at least some of my punches work with vinyl. I wanted a little accent around the top and used an EK Success punch to create it.

I'm not sure if this is going to school or keeping me company in my craft room. I'm happy with it either way. Thank you Cricket Vinyl Supplies for the opportunity to have all of this fun!! 

(If you haven't done it already, check out my post from yesterday so you have an opportunity to win the blog candy from the blog hop.)


Monday, September 9, 2013

Challenge #177 - Fall Vinyl

Welcome to My Cards 'N Stuff and the FCCB Vinyl EDU Cricut Crawl - Fantabulous Cricut's version of a Blog Hop!! (You're almost done, what has been your favorite project so far??)
This week we are challenging you to create a project using vinyl you have cut using your Cricut. We have a fabulous sponsor, Cricket Vinyl Supplies. If we get 100 participants in this challenge, Cricut Vinyl Supplies will give away a Cricut Expression package that includes a Cricut Expression machine, deep cut blade, Jasmine Cricut cartridge, ten 12” x 12” assorted sheets of matte vinyl and one 12” x 12” gridded transfer tape. How exciting is that??

Remember, you can purchase vinyl for your project at Cricket Vinyl Supplies using the coupon code: fantabulous for a 15% discount!  
If you've come from Ro at Toodle Noodle Creative, you're in the right place!  If you've just happened across my blog and would like to see all the fabulous Design Team creations head on over to Fantabulous Cricut HERE to start at the beginning.
Make sure to check out each DT member's blog!  There will be Blog Candy along the way at ALL our DT members' blogs, and there will be a Grand Prize up for grabs at FCCB for one participant who submits a project using vinyl at FCCB!
For my project today I did a couple of small fall things for school and one for home. I really enjoy using vinyl when I try it, but I do find it a bit intimidating, so none of my projects are really elaborate and are great for beginners.
When you teach high school fall also includes all of the fall sports. One of the people I teach with just became the JV Volleyball coach so I made this for her (she loved it, btw)! 

I got the bubble out after I took the picture:/

One of our school colors is gold, so I cut this at 5" in gold from the Sports Mania Cartridge. It is on on one of the white boards in her room and it gives her a place to keep track of her win/loss record. She's a math teacher and will use these statistics for class, too. Double duty!!

Of course our generous sponsor made sure we had plenty of vinyl to work with so my second project is for my classroom. I have to share a room with another teacher so my decorations can't take up the whole world. I decided I would at least put the title of my class up in something that was a little more professional looking than this.

It's high on the wall and I can't reach the top very well.
I cut the title of the class from leaf tags on the Speaking of Fall cartridge. Each of the tags was cut at 3". The weeding of these was a little time consuming but it turned out pretty nice.
Now I have more board space to write on!


I also cut a few leaves to put down the side of the board to add a little more fall feel. They were cut at 3" also. The fall colors they sent are great and went nicely with my red polka dots and apples.

The last project is a recycled item. I will do a bit of a tutorial tomorrow with more pictures, but here is a little teaser of the final project.


Come back tomorrow to see the whole thing!!

Now for the part you've all been waiting for, Blog Candy!!


The winner will receive this cute 6 x 6 paper pad from MME as well as the two pack of embossing folders. The only things you have to do are be a subscriber and leave a comment below answering the question I asked in the first paragraph (favorite project so far). Good luck everybody!
Your next stop is Michelle at Just ANutter Paper Crafter.  Make sure to visit all the stops along the way and when you get done, make sure you link up your project to FCCB's Fantabulous Cricut Crawl post!!
Happy Crawling!!
Here is the line up in case you get lost:
Robin http://robinscreativecottage.blogspot.com

Monday, September 2, 2013

Name that Tune

Happy Labor Day!! I know some of you are off work today and I hope you enjoy it!

It's time for another challenge at Fantabulous Cricut Challenge.  The theme for the week is music. I love music!! 
I am that teacher who goes to all of the concerts and few of the sporting events (except basketball - I love basketball!).
I was involved in music through college and it still holds a warm place in my heart.


I used two Cricut cartridges to create this card; Plantin Schoolbook and Quarter Note. I really appreciate that there is a music themed cartridge, I love it! The circles and squares were cut from Plantin and the 16th note and sentiment were cut from Quarter Note. The patterned paper is from the Authentique 6"x6" Essentials stack. The black is stash scraps. 

I used a sketch from Mojo Monday. I really like using sketches, especially when I'm not feeling all that creative. Their sketches are a wonderful place to start a project.

I hope everyone's lives have begun to calm down a bit since the start of school and we have lots of participation this week! Remember we have something really great next week, so if you can't play now be sure to come back then, it's going to be such fun!!

Sunday, August 25, 2013

Vinyl University is coming!!

We are all very excited for the Vinyl University that is coming soon at Fantabulous Cricut. If you've always wanted to try working with vinyl but have been intimidated, this will be a great week for you!! Head over and find out some of the details and check out ways you can get involved BEFORE it starts (oh, and there is a discount involved). Click HERE for more information. Hope you will join the fun!


Fantabulous Cricut

Monday, August 19, 2013

Summer camp

Wow, it was crazy last week and school starts today! Summer is officially over for most of us:(  But we are remembering all the fun of summer at Fantabulous Cricut and making projects with the theme of Summer Camp! Most of my camping experiences revolve around Cub/Boy Scouts and sitting around the table was one of the best parts of the day. We would play card games or just sit around and talk after the kids calmed down.  I really enjoyed that part of camping so that's what I used in my card.


All of  the Cricut cuts are from the Camp Out cartridge. The tree was cut at 3 1/4". (I know it may look a little weird but there always seemed to be a random sapling close to the table.) The table was cut at 2 1/2" and the lantern was cut at 1". I distressed around the edge of the green mulberry paper and inked the tree a little. I colored the trunk with a Promarker so it wasn't all one color. All of the pieces are on foam tape. 


Saturday, August 17, 2013

Fantabulous Prize!!

I just want to remind everyone that there is a fantabulous prize for the winner of the challenge this week at Fantabulous Cricket. The winner will receive a set of 10 Cri-kits pens and a magnetic holder for your Cricut. There are some adorable projects there so head over and check them out and don't forget to join in! You can't win if you don't enter!!

Sunday, August 11, 2013

A Little Mermaid

Surprise, a random post! It feels like forever since I've done something just for fun. It's been a busy couple of weeks around here. My daughter moved into her first place away from home, I've been trying to figure out how to rearrange my space and get ready to go back to school. It's a lot to think about (though not a whole lot is getting moved yet).

The wonderful people at The Paper Nest gave us several images to use for this week's challenge at Fantabulous Cricut Challenge blog and I wanted to practice my coloring more so I used Mermaid Ellie for this card. There is are no Cricut cuts, but there could have been. I used Spellbinders for the background layers instead.  I just bought the Darice cloud embossing folder and used it as well.  


I colored her with my Promarkers. I really do enjoy coloring and need to do it more often so I don't get out of practice. I tied some seam binding on the side for a little extra color. The sentiment is from the K Andrew designs Splashtastic Summer set. The brad is from The Eyelet Outlet.

Tomorrow is my last official day of summer vacation (even though I have a meeting), then it all starts again. Here's to a great school year for everyone who deals with that in their lives!


Monday, August 5, 2013

Make a Splash at Fantabulous Cricut


Happy Monday everybody! We've been having such fun at the Fantabulous Cricut Challenge blog! We received some wonderful digis to work this week from our sponsor, The Paper Nest. They have some really adorable images available in either rubber or digital format, go check them out!!

The theme this week was Make a Splash so all of our images are water themed. This cute little guy is Sandcastle Owen who you can find here.


I haven't colored with my Promarkers for quite a while and it shows. I also got my first Copic and was playing with it on his face. Obviously need some more work there, too! I do enjoy coloring, and I really like digital stamps because you can size them to your project. The Paper Nest has some really cute digis! 

Since this is a Cricut challenge, I suppose I should tell you which cartridge I used ;-) The card itself is cut from the Life's a Beach cartridge. I cut it at 5 1/2" out of kraft card stock. The sea shell cuts out with the card so you can layer it. I sprayed it with some home made glimmer spray. I colored on the back of the shell with my Tim Holtz distress marker and let the color bleed through the front to add some dimension to the shell. The starfish is a brad from the Eyelet Outlet.

I hope everyone has a great week. Please visit our sponsor at www.the-papernest.com and join us by creating something "splashy"!

Monday, July 22, 2013

Fruitalicious

Welcome to Fruit Salad week at the Fantabulous Cricut Challenge blog. This week we were to use any fruit in our project. I used the fruit cut from the Nate's ABCs cartridge. It is cut at 3 3/4" from an assortment of stash papers.


It has a large base so I decided there was perfect for an Action Wobble (couldn't get a good picture of the wobble, sorry). I used my Gelatos for the first time for the white highlights on the fruit.


The background is a plain piece of white card stock that I sprayed with my homemade glimmer spray. I sprayed through some punchinello for a nice polka dot look. It's kind of a subtle look but I like how it turned out. It may have looked a little better with a solid piece between the two layer but I had it all together before I thought about that and didn't want to tear it all up. 

Make sure to visit all the design team members to get some inspiration and then link your project. Have a great week!

Sunday, July 14, 2013

Sulley

It's been a long time (at least it feels like it) since I've done a challenge post, but I wanted to do this one for sure. The challenge this week at BBTB2 is a Disney challenge. I LOVE most things Disney and the cartridges are no exception.


This is Sulley from the Best of Pixar cartridge. I couldn't decide so I had my son pick a movie, I picked the image from there. He is cut at 4 1/4" to be sure the small pieces cut ok. I got some new blades from Roland a couple of weeks ago and they did make quite a difference on the tiny cuts. I also used the Plantin Schoolbook cartridge for the background stars. (The card is 6"x6" by the way.)

I actually used some washi tape on my card. I usually forget I have it or don't have anything that works. I used the black diamond and a row of narrow white above it. You can't see it but it mutes the colors of the stars underneath. 

I hope everyone has a great Sunday night and a great new week.


Monday, July 8, 2013

Cute as a Bug...that's the theme (updated with winner!)

....at the Fantabulous Cricut Challenge blog this week. There are so many cute bugs on so many different Cricut cartridges it was hard to choose. I ended up with this one.


Dot
This is Dot from the Disney Best of Pixar cartridge. I love the Disney cartridges, but they are notorious for the tiny pieces so she is cut at 4 1/2" and popped up with some foam tape. I used her name to help with the rest of the design of the card by cutting circles with a Sizzix die and creating a circle shaped flower. The finished card is a 6x6. The patterned paper is from Prima and the solid is a mix of stash and paper from Recollections and The Paper Studio. I made the flower from bakers twine, fluffed it and glued a button from my stash in the center. The stem is lime green rattail cord that was glued in place with some Scotch quick dry glue. The seam binding is from Wild Orchid Crafts.

Have a super week everyone!

**I did this post before the end of my give away from last week and forgot to post the winner. I went to random.org and it decided that #17 was the winner. Congratulations Mollie! I'll be contacting you for your address.


Friday, July 5, 2013

FCCB winner will be announced Monday!

Hi all. FCCB asked us to announce our blog candy winners on Monday, so I will hold off on picking the winner until Sunday. That's good news for those of you who haven't had a chance to comment yet, you have a little more time! Good luck everyone!!

Monday, July 1, 2013

4th of July Fantabulous Cricut Crawl

Fantabulous Cricut


Welcome to My Cards N Stuff and the 4th of July Fantabulous Cricut Crawl - Fantabulous Cricut's version of a Blog Hop!!

In honor of the 4th of July holiday, we're having a Red, White and Blue Crawl.  Each Design Team member has created a fabulous project using Red, White and Blue as the main colors, and of course at least one Cricut cut!

If you've come from LB at Cool Beans by L.B., you're in the right place!  If you've just happened across my blog and would like to see all the fabulous Design Team creations head on over to Fantabulous Cricut HERE to start at the beginning.

Make sure to check out each DT member's blog!  There will be Blog Candy along the way at some of our DT members' blogs, and there will be a Grand Prize up for grabs at FCCB for one participant who submits a "Save the Earth" project at FCCB!

For my project I made a card using the Everyday Paper Dolls Cricut Cartridge. It's an old one but great to use when you want to make a child image of any kind. 


It's also great for using up scraps. The only part I used a whole piece of paper on was the doll itself, all of the rest of the cuts were scraps. She was cut at 4" and the other pieces all just cut to the correct size automatically as long as "real dial size" is off (love that!). I used Stickles on her shoes to make them sparkle and added a little bling on the ribbon. The background was embossed with an embossing folder. My nephew had a new baby a couple of weeks ago and I'm going to send this to her big sister for the 4th.

Blog Candy!!

I got my Webster's Pages box last week and thought I'd share some of it (and a bit of the last box) with one lucky crafter. The papers are 6x6 and there are some journaling cards to go with them. There will also be a couple of other little things thrown in just for fun! All you have to do is comment on this post, I will draw the winner on Friday, July 5. If you would like to become a follower that would be great, but it's not required. Good luck!

Your next stop is Michelle at Just ANutter paper crafter.  Make sure to visit all the stops along the way and when you get done, make sure you link up your project to FCCB's Fantabulous Cricut Crawl post!!

Happy Crawling!!

Here is the line up in case you get lost: