Monday, September 23, 2013

Going Places at Fantabulous Cricut

Welcome!!
Today at Fantabulous Cricut we are all going places and making projects showcasing ways to get there.

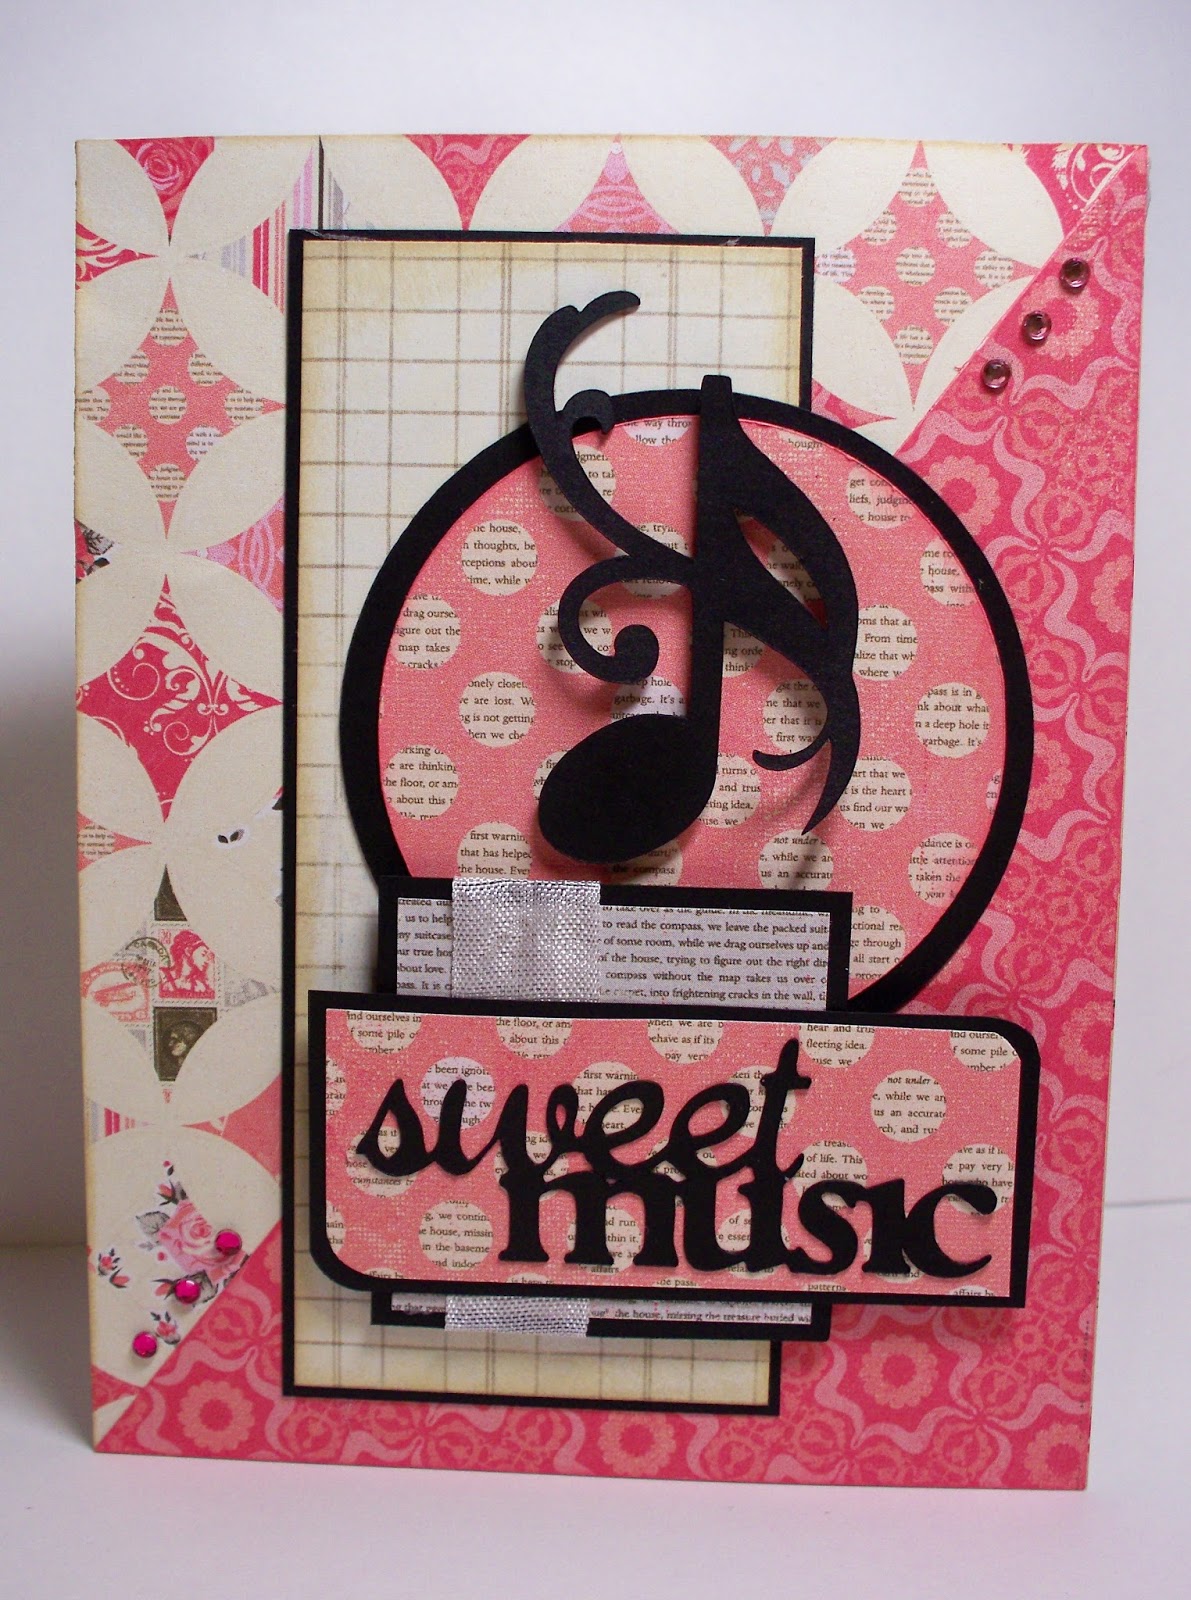
I made a card (surprise, huh!!) that was inspired by a 6x6 Prima paper stack called Spaceboy. This card is a little different for me as it opens at the top. I have a mini clothespin holding it in the picture but I think I might trade it out for a mini silver binder clip. 

I don't know what happened with this picture, the background color is so pink! The real color is the other pictures:/

The card is a typical A2 size and the base the white layer. The front of the card is just the paper with a little added bling and a sentiment from the Just Because Cards cartridge. I used my Cri-Kits glitter pens to trace the stencil image and then cut around it.


When you open the card the sides go down and the rocket is blasting off. The rocket is cut from the Everyday Paper Dolls cartridge at 4". The paper that is covering the front and back of the card is from the same Prima stack. The blue that the rocket is on is Recollections. 

I folded a piece of paper that was the same size as the base and folded each side in half (looks like a "W") and glued it in the center of the base. I debated trying to make it pop up or just do it this way. The pocket that was created could be used to tuck a gift card or some cash into.

I hope everyone enjoys all the projects this week, have a good one!

Monday, September 16, 2013

ABC's - 123's at Fantabulous Cricut

Good grief! I totally forgot that I said I would do a project this week with my Cri-kits pens for Fantabulous Cricut. This card was literally done in 15 minutes, so be patient with it.

I used my Sizzix Flip it card die for the base and a Spellbinders scalloped circle for the insets. Where did I use the Cricut you ask?? Well, I used my Cri-kits glitter gel pens to draw the "boo" and the ghost with the Simply Charmed Cricut cartridge. They worked really well and made quick work for the card.

Peachy Keen Stamp face (don't judge the stamping - it was super quick)

I added a little orange seam binding and a few buttons and voila, a super quick Halloween card. I will definitely be using those pens more in the future, they were great!!

Ok, now for the winner of my blog candy. Lisa C. of my Little Bits!! Contact me with your addy and I'll get that package out this week:-)

Have a great week.


Tuesday, September 10, 2013

Vinyl Project #3

As promised here is the little tutorial and my third vinyl project for the week of Vinyl EDU at Fantabulous Cricut. If I can think of any more things to do with it (and have time) there could be more...

I started with this empty container, added some vinyl, and ended up with this cute pencil holder.

I used the Simply Charmed cartridge for the cute pencil. I tried this project once before with a different cartridge and it cut differently than I expected it to which caused some wasted vinyl. Hopefully my mistake will keep someone else from doing it.

I decided to do a test run with paper this time. I set my Cricut as shown below to cut the vinyl. I had the blade depth at 3 for the first try, but raised it to 4 on the red vinyl as it seemed a bit thicker. I also turned on the multi-cut feature to get a clean cut for weeding purposes.

excuse the dust!
 I cut it out in white card stock before I tried it on the vinyl. 

I didn't change the settings, but I could see which way it was going to cut and how long a piece of vinyl I would need.


I didn't change the settings so I outlined it so you could see.

I cut the trial piece 4" and made my final piece 4 1/2" since I had a little more room than I originally thought.


Here is the base piece cut out with the transfer tape on top. I am very stingy with my supplies of this and only use what I need. I burnished the image onto the transfer tape to avoid wrinkles, etc.


After the pencil had adhered to the transfer tape I removed the backing and added it to the container. I added the rest of the layers and ended up with this cute little guy! 


I will admit I had a hard time getting the layers to line up but it was worth it in the end. I ended up cutting the transfer tape right next to the straight edges on the larger pieces in order to get them sort of lined up. 

I made one discovery that I was pleased with. I found out that at least some of my punches work with vinyl. I wanted a little accent around the top and used an EK Success punch to create it.

I'm not sure if this is going to school or keeping me company in my craft room. I'm happy with it either way. Thank you Cricket Vinyl Supplies for the opportunity to have all of this fun!! 

(If you haven't done it already, check out my post from yesterday so you have an opportunity to win the blog candy from the blog hop.)


Monday, September 9, 2013

Challenge #177 - Fall Vinyl

Welcome to My Cards 'N Stuff and the FCCB Vinyl EDU Cricut Crawl - Fantabulous Cricut's version of a Blog Hop!! (You're almost done, what has been your favorite project so far??)
This week we are challenging you to create a project using vinyl you have cut using your Cricut. We have a fabulous sponsor, Cricket Vinyl Supplies. If we get 100 participants in this challenge, Cricut Vinyl Supplies will give away a Cricut Expression package that includes a Cricut Expression machine, deep cut blade, Jasmine Cricut cartridge, ten 12” x 12” assorted sheets of matte vinyl and one 12” x 12” gridded transfer tape. How exciting is that??

Remember, you can purchase vinyl for your project at Cricket Vinyl Supplies using the coupon code: fantabulous for a 15% discount!  
If you've come from Ro at Toodle Noodle Creative, you're in the right place!  If you've just happened across my blog and would like to see all the fabulous Design Team creations head on over to Fantabulous Cricut HERE to start at the beginning.
Make sure to check out each DT member's blog!  There will be Blog Candy along the way at ALL our DT members' blogs, and there will be a Grand Prize up for grabs at FCCB for one participant who submits a project using vinyl at FCCB!
For my project today I did a couple of small fall things for school and one for home. I really enjoy using vinyl when I try it, but I do find it a bit intimidating, so none of my projects are really elaborate and are great for beginners.
When you teach high school fall also includes all of the fall sports. One of the people I teach with just became the JV Volleyball coach so I made this for her (she loved it, btw)! 

I got the bubble out after I took the picture:/

One of our school colors is gold, so I cut this at 5" in gold from the Sports Mania Cartridge. It is on on one of the white boards in her room and it gives her a place to keep track of her win/loss record. She's a math teacher and will use these statistics for class, too. Double duty!!

Of course our generous sponsor made sure we had plenty of vinyl to work with so my second project is for my classroom. I have to share a room with another teacher so my decorations can't take up the whole world. I decided I would at least put the title of my class up in something that was a little more professional looking than this.

It's high on the wall and I can't reach the top very well.
I cut the title of the class from leaf tags on the Speaking of Fall cartridge. Each of the tags was cut at 3". The weeding of these was a little time consuming but it turned out pretty nice.
Now I have more board space to write on!


I also cut a few leaves to put down the side of the board to add a little more fall feel. They were cut at 3" also. The fall colors they sent are great and went nicely with my red polka dots and apples.

The last project is a recycled item. I will do a bit of a tutorial tomorrow with more pictures, but here is a little teaser of the final project.


Come back tomorrow to see the whole thing!!

Now for the part you've all been waiting for, Blog Candy!!


The winner will receive this cute 6 x 6 paper pad from MME as well as the two pack of embossing folders. The only things you have to do are be a subscriber and leave a comment below answering the question I asked in the first paragraph (favorite project so far). Good luck everybody!
Your next stop is Michelle at Just ANutter Paper Crafter.  Make sure to visit all the stops along the way and when you get done, make sure you link up your project to FCCB's Fantabulous Cricut Crawl post!!
Happy Crawling!!
Here is the line up in case you get lost:
Robin http://robinscreativecottage.blogspot.com

Monday, September 2, 2013

Name that Tune

Happy Labor Day!! I know some of you are off work today and I hope you enjoy it!

It's time for another challenge at Fantabulous Cricut Challenge.  The theme for the week is music. I love music!! 
I am that teacher who goes to all of the concerts and few of the sporting events (except basketball - I love basketball!).
I was involved in music through college and it still holds a warm place in my heart.


I used two Cricut cartridges to create this card; Plantin Schoolbook and Quarter Note. I really appreciate that there is a music themed cartridge, I love it! The circles and squares were cut from Plantin and the 16th note and sentiment were cut from Quarter Note. The patterned paper is from the Authentique 6"x6" Essentials stack. The black is stash scraps. 

I used a sketch from Mojo Monday. I really like using sketches, especially when I'm not feeling all that creative. Their sketches are a wonderful place to start a project.

I hope everyone's lives have begun to calm down a bit since the start of school and we have lots of participation this week! Remember we have something really great next week, so if you can't play now be sure to come back then, it's going to be such fun!!